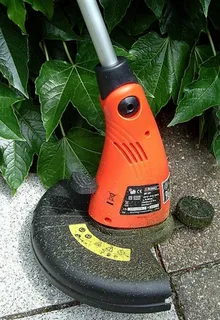
String trimmers are essential tools for maintaining a neat and tidy lawn, but like any piece of equipment, they can break down or experience wear and tear over time. Instead of rushing to a repair shop or buying a new one, you can save both time and money by learning how to fix your string trimmer yourself. In this article, we’ll explore how DIY string trimmer repair: fix it yourself and save money can empower you to keep your garden equipment in top shape without breaking the bank.
Why Choose DIY String Trimmer Repair?
Professional repairs can be costly, especially when dealing with small problems that don’t require specialized tools or expertise. Taking a DIY approach allows you to:
- Save money on labor and expensive service fees.
- Gain confidence in handling basic maintenance.
- Extend the life of your string trimmer.
- Quickly address minor issues without waiting for appointments.
With a little guidance, many common string trimmer problems can be solved at home.
Common String Trimmer Problems and How to Fix Them
1. Replacing the Trimmer Line
One of the most frequent issues is running out of trimming line. Replacing it is simple and requires minimal tools. Remove the spool cap, wind new line according to the manufacturer’s instructions, and secure it in place. This quick fix saves you from buying a new spool or an entirely new trimmer.
2. Cleaning or Replacing the Air Filter
A clogged air filter can reduce engine performance or cause the trimmer to stall. Remove the air filter cover, take out the filter, and clean it with soap and water or replace it if necessary. Regular cleaning ensures your trimmer runs smoothly and efficiently.
3. Fixing the Spark Plug
If your string trimmer won’t start, a dirty or faulty spark plug might be the culprit. Remove the spark plug and inspect it for dirt or damage. Clean it with a wire brush or replace it for better ignition.
4. Checking the Fuel System
Old fuel can clog the carburetor and cause starting problems. Drain stale fuel, clean the fuel tank, and refill with fresh gasoline mixed with the correct oil ratio (for two-stroke engines). This often restores proper functioning.
Tools You’ll Need for DIY String Trimmer Repair
Before you start, gather these basic tools:
- Screwdrivers (flathead and Phillips)
- Pliers
- Wire brush
- Replacement parts (trimmer line, spark plug, air filter)
- Clean cloths and gloves
Having these on hand will make your repair process smooth and hassle-free.
Safety Tips for DIY Repairs
Always prioritize safety when working with power tools:
- Disconnect the spark plug before starting any repairs.
- Work in a well-ventilated area.
- Wear protective gloves and eyewear.
- Follow manufacturer instructions carefully.
Conclusion: DIY String Trimmer Repair – Fix It Yourself and Save Money
Learning how to tackle simple maintenance and repairs on your string trimmer can save you significant money and time. By embracing DIY string trimmer repair: fix it yourself and save money, you take control of your garden equipment’s upkeep, avoid costly repairs, and ensure your trimmer stays reliable season after season. So next time your trimmer acts up, remember—you’ve got the tools and knowledge to fix it yourself!

