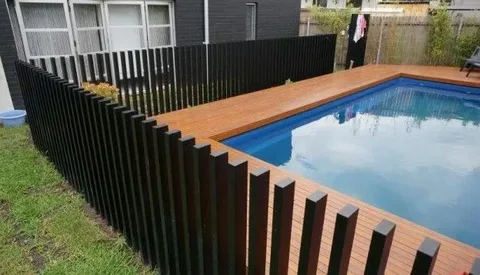
Installing a pool fence is an essential safety measure for any pool owner. Not only does it prevent accidental drownings, but it also ensures compliance with local safety regulations. If you’re considering a cost-effective and rewarding project, DIY pool fence installation is a great option. This article will guide you through the necessary tools, helpful tips, and a realistic timeline to get your pool fence up and secure.
Essential Tools for DIY Pool Fence Installation
Before starting your DIY pool fence installation, gathering the right tools is crucial to ensure the process goes smoothly. Here’s a list of essential tools you’ll need:
- Measuring tape: For precise measurement of your pool perimeter.
- Post hole digger or auger: To dig holes for fence posts.
- Level: To keep posts and panels straight.
- Drill and drill bits: For securing panels and brackets.
- Screwdrivers or impact driver: To fasten screws.
- Concrete mix: To secure fence posts firmly in the ground.
- Saw: If you need to cut panels or posts to size.
- Protective gloves and safety glasses: For personal safety during installation.
Having these tools ready will make your DIY pool fence installation efficient and less frustrating.
Expert Tips for a Smooth Installation
Even if you have all the right tools, following expert tips can save you time and help avoid common mistakes during your DIY pool fence installation:
1. Know Your Local Regulations
Before installation, check your local pool safety laws regarding fence height, gate locks, and materials. Compliance is mandatory and ensures your pool area is legally safe.
2. Plan Your Fence Layout
Measure the pool perimeter accurately and plan the placement of posts and gates. Mark the spots clearly to avoid repositioning during digging or installation.
3. Use Quality Materials
Choose durable fencing materials that can withstand weather conditions and pool chemicals. Aluminum, steel, or PVC fencing are popular choices.
4. Secure Posts with Concrete
For long-lasting stability, set fence posts in concrete. Allow adequate drying time before attaching panels to avoid shifting.
5. Install Self-Closing and Self-Latching Gates
Safety gates are critical to prevent unauthorized or accidental entry to the pool area. Ensure they open outward and are out of reach of children.
Timeline for DIY Pool Fence Installation
Understanding the timeline helps you allocate enough time and manage your expectations. Here’s a general breakdown:
- Day 1: Planning and measuring the pool perimeter. Marking fence post locations.
- Day 2: Digging post holes using a post hole digger or auger.
- Day 3: Setting posts in concrete and allowing them to cure (usually 24-48 hours).
- Day 4: Attaching fence panels and gates to the posts.
- Day 5: Final checks to ensure gate functionality and fence stability.
Depending on the size of your pool and your experience level, your DIY pool fence installation may take anywhere from three to five days. Allow extra time if you are customizing or working with challenging terrain.
Conclusion
A DIY pool fence installation is a practical project that can enhance the safety of your pool area while saving money. By preparing the right tools, following expert tips, and setting a clear timeline, you can successfully install a durable and compliant pool fence. Safety is paramount—ensure every step is done carefully to protect your loved ones and enjoy peace of mind.

